Bacon is one of those foods you can cook ahead of time, cool, and store perfectly well for the rest of the week. Most people think of pan searing bacon as the perfect cooking method.
Believe it or not, hat's not necessarily true. Though it is the most common way people do it, there is an easier and better route: baking the bacon.
Baking your bacon will reduce the cooking mess that comes with cooking bacon on the stove top and will ensure crispy and evenly cooked bacon strips. It will also help you cut down on meal prep time.
| In this Article You Will Learn: |
How to Meal Prep Crispy Bacon Ahead of Time
The reason most items in restaurants take only a few minutes to make is because the bulk prep has been done ahead of time by the cooks, and when it comes to firing an order, it's all simply cooking a few items and building a beautiful plate together.
As I explain in, how to properly meal prep your eggs, when it comes to food prep, I follow a few non-negotiable prep guidelines to ensure success.
Bacon holds exceptionally well once it is cooked - reheating it takes a quarter of the time compared to cooking any from scratch, and it makes your morning routine that much simpler. You can also use this bacon not only for breakfast but also for lunch if you are craving a BLT or any sandwich that could use one or two strips of bacon. Best yet, this meal prep trick works for both turkey bacon and regular bacon. The only thing you need to do is follow the steps below.
Pro Tip: Cook your bacon as you are prepping your veggies, or while taking care of a longer task during your meal prep.
Ingredients:
- 4-12 bacon slices (If preferred, sub for turkey bacon)
Kitchen Needs:
- Small appliance oven or regular oven
- Baking sheet pan
- Small tongs or fork
- Foil
- Paper towels

Step One: Preheat your Oven and Prep Bacon
Preheat your oven at 375 degrees Fahrenheit.
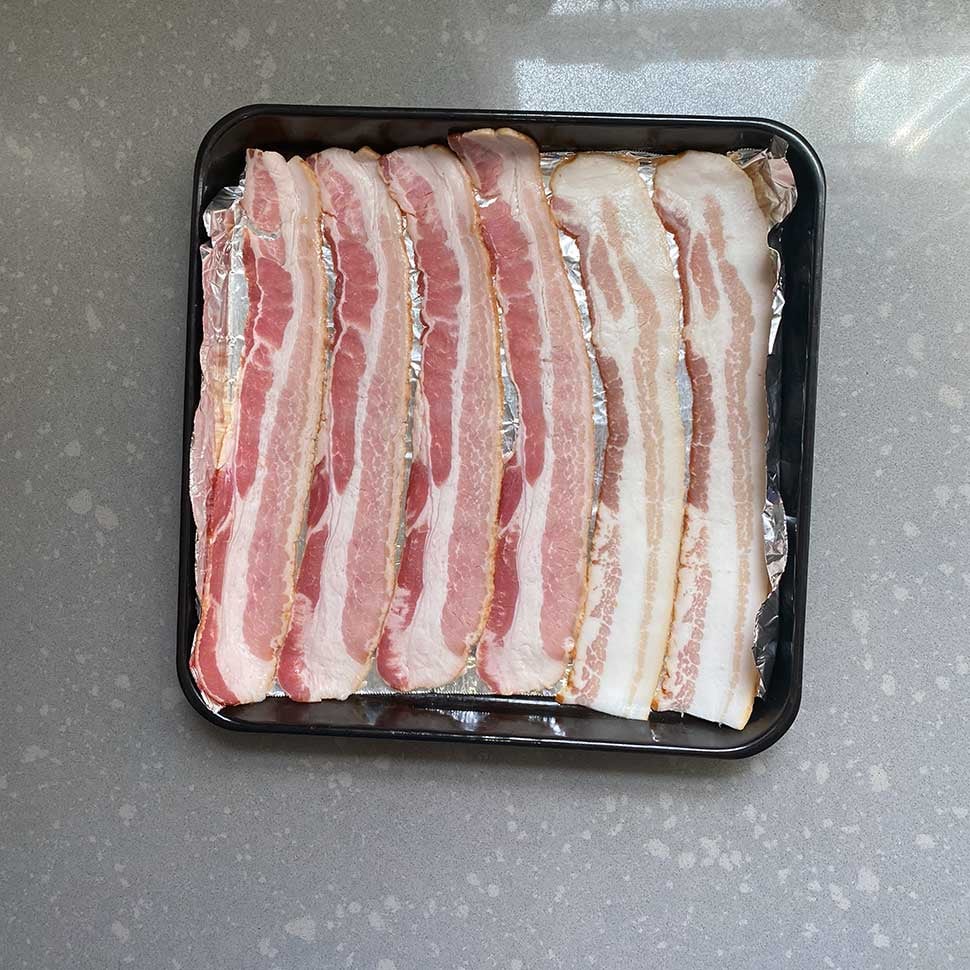
Line your baking sheet pan with foil. This will help clean up by trapping the rendered fat in the foil, rather than the pan.
Lay the bacon strips lengthwise, neatly, one next to each other until the entire sheet pan is arranged with bacon.
How to Not Screw This Up
Do not overlap the bacon. The strips should not touch each other. This helps promote even cooking -any overlapping of bacon will steam the other pieces of meat inhibiting that portion of the strip from getting crispy. Trust me on this one - I've made that mistake many times in my cooking career.
Step Two: Bake Bacon for 10 minutes
Depending on the thickness of your bacon and your oven, roughly 10 minutes of baking is a good time frame to follow - give or take a minute. Keep an eye on it to keep it from overcooking and burning.
Last time I tested this recipe, my bacon was done at 9 minutes and 30 seconds. Yes, precision matters if you want the perfect bacon consistency.
Keep an eye on the bacon as time nears the 10 minute mark to better estimate whether the strips will need more or less time.
Pro Cooking Tips to Try
A great tip while meal prepping is to slightly under-cook your items so that when you are reheating them, the items remain juicy and do not get dried up.
Another culinary trick for you to try is rotating the pan halfway through the total baking time. This helps better distribute the heat.
When you rotate the pan, the half portion of the pan that was exposed to the radiating higher heat of the back of the oven, is now exposed to a cooler temperature in the front, and vice versa. This helps with even cooking and balancing the cooking process, given there will be slight temperature variations in the oven. Smart, I know.
Step Three: Remove Bacon, Drain Excess, Fat, and Cool
Once the bacon is fully cooked remove the baking sheet from the oven using oven mitts, and carefully transfer the bacon to a layer of paper towels to drain the excess fat.
Pat dry to remove any excess fat on the top, and allow the bacon to cool. If eating, serve immediately and enjoy your crispy bacon!
If your sheet pan was too small to fit all the bacon you wanted to cook, repeat this process.
Storing and Shelf Life
Since most bacon is cured, there's a huge benefit to cooking it at once since it will hold very well in the fridge for at least a week. I always suggest you refresh your prep every 5-7 days to ensure your food is as fresh as possible.
Store your bacon in a long rectangular Tupperware and cover with a lid. Refrigerate.
If you have a safe place for storing the bacon outside of a Tupperware, neatly arrange the bacon in a stack inside a large enough Ziploc bag.
Reheat your bacon in a small oven at 350F for 2-4 minutes. Avoid overcooking it.
Keto Bacon Hacks
Bacon is a popular keto friendly food because of its high fat content - it is pork belly after all!
But if you are following a keto diet, consuming high amounts of saturated fats, from foods like bacon, is likely not the greatest for your health. So instead of chowing down on packs of bacon, try mixing in more healthy fats like plant oils, avocado, or even nuts to help support your long-term health goals.
Depending on the kind, and as an average, 2 bacon strips contain 8 grams of protein and 8 grams of fat!
Serve this With
In case you need more inspiration for all the things you can put bacon on, here's some ideas:
- Break a bacon strip in half and make a breakfast sandwich using our delicious baked egg bites.
- Break it into crumbles to add to salads
- Garnish your grilled chicken breast with melted cheese and bacon
- Add it your roasted veggies
Want to get more out of your weekly meal prep efforts? Stick to your calorie goals and maximize results with this free meal prep toolkit for weight loss. An RD-written guide complete with macro meal planner, food lists, and expert advice to help you lose weight quickly.


